E9 的后端接口只支持 GET 和 POST 类型,其它类型接口会调用不到。
创建接口
按照泛微开发规范,创建接口类需创建两个类,一个类用于暴露接口,另一个类写接口的核心代码。
创建暴露接口类:
需要在`com.api.interfaces.*`路径下创建类,否则接口不会被识别。
在类上需要使用`@Path`注解,注解的 value 填写接口路径,注意此接口路径不能与其它暴露类接口路径相同。
@Path("/secondev/demo/test")
public class TestApi extends TestAction {
}
创建核心业务接口类
类需要在`com.engine.interfaces.*`路径下。
下面示例中分别创建了 GET`/secondev/demo/test`接口和 POST`/secondev/demo/test/handle`接口,接口全路径为暴露类接口路径+核心类接口路径。
在类中可创建方法定义接口
- `@Path`定义接口路径,可以为空
- `@GET`或`@POST`定义接口请求方法,只支持这两个请求方法,其它方法如 PUT,DELETE 不支持
- `@Consumes`注解定义接口接收的请求参数类型,此注解不是必需,但建议加上,明确接口请求参数类型
- `@Produces`注解定义接口的返回参数类型,此注解不是必需,但建议加上,明确接口返回参数类型
方法中的`@Context HttpServletRequest request`和`@Context HttpServletResponse response`可获取方法的请求和响应对象,这两个参数不是必需要有的,按需加上。
service 实例获取:
不推荐直接使用 new 创建 service 实例,需要使用`ServiceUtil.getService()`方法获取 service 实例,service 类需要继承`com.engine.core.impl.Service`类,这样的好处是可以通过标准接口拦截 service 方法,方便后续修改和扩展。
接口示例:
public class TestAction {

    private TestService service;

    @Path("")
    @GET
    @Consumes(MediaType.APPLICATION_JSON)
    @Produces(MediaType.TEXT_PLAIN)
    public Response hello(@Context HttpServletRequest request, @Context HttpServletResponse response) {
        return Response.ok("success").build();
    }

    @Path("handle")
    @POST
    @Consumes(MediaType.APPLICATION_JSON)
    @Produces(MediaType.APPLICATION_JSON)
    public Response handle(@Context HttpServletRequest request,@Context HttpServletResponse response) {
        Map<String, Object> params = ParamUtil.requestJson2Map(request);
        try {
            Map<String, Object> result = getService().handle(params);
            return Response.ok(result).build();
        } catch (Exception e) {
            return WebExceptionHandler.handle(e);
        }
    }

    private TestService getService() {
        if (service == null) {
            service = ServiceUtil.getService(TestServiceImpl.class);
        }
        return service;
    }

}
创建 Service 类
service 接口
public interface TestService {

    Map<String, Object> handle(Map<String, Object> params);
}
service 实现类,需要继承`com.engine.core.impl.Service`
在实现类中就可以写业务代码了,不需要再创建 Cmd 类,按照泛微开发规范,可以再创建 Cmd 类,让 cmd 类执行业务代码。
public class TestServiceImpl extends Service implements TestService {
    @Override
    public Map<String, Object> handle(Map<String, Object> params) {
        return commandExecutor.execute(new TestCmd(params));
    }
}
创建 Command 类
在此类中写业务代码。
cmd 类需要继承`AbstractCommand<>`类,其中的范型类型为 execute 方法的返回类型。
public class TestCmd extends AbstractCommand<Map<String ,Object>> {
    private final Map<String, Object> params;

    public TestCmd(Map<String, Object> params) {
        this.params = params;
    }

    @Override
    public Map<String, Object> execute(CommandContext commandContext) {
        // 业务代码
        return Collections.emptyMap();
    }
}
接收参数
接收请求参数
使用`ParamUtil`获取请求参数
标准的`com.engine.common.util.ParamUtil`可以获取接口请求参数,包括 GET 方法的参数,和 FORM 形式的请求参数,此方法不支持获取 JSON 参数。
@Path("")
@GET
@Consumes(MediaType.APPLICATION_JSON)
@Produces(MediaType.TEXT_PLAIN)
public Response hello(@Context HttpServletRequest request, @Context HttpServletResponse response) {
    // 获取请求参数,参数会存在 map 中
    Map<String, Object> params = com.engine.common.util.ParamUtil.request2Map(request);
    return Response.ok("success").build();
}
使用`@QueryParam`注解获取请求参数
该注解可获取接口链接中的参数
注解中需指定参数名称
@Path("/param")
@GET
@Consumes(MediaType.APPLICATION_JSON)
@Produces(MediaType.TEXT_PLAIN)
public Response param(@QueryParam("name") String name) {

    return Response.ok("success").build();
}
使用`@FormParam`注解获取表单参数
该注解可获取接口请求参数类型为 FORM 的表单参数
@Path("/param")
@POST
@Consumes(MediaType.APPLICATION_FORM_URLENCODED)
@Produces(MediaType.TEXT_PLAIN)
public Response param(@FormParam("name") String name) {

    return Response.ok("success").build();
}
接收 JSON 参数
- 1.使用参数对象接收
我不建议使用这种方式,因为一旦 json 转为指定对象抛出了异常,日志不会打印出任何错误信息,导致问题极难排查,我建议手动将`HttpServletRequest`中的输入流转为指定对象。
传入的 JSON 将直接转换为参数对象,例如:json 将转换为 UserParam,此方式对 FORM 参数无效
@Path("/user")
@POST
@Consumes(MediaType.APPLICATION_JSON)
@Produces(MediaType.APPLICATION_JSON)
public Response user(UserParam userParam) {
    try {
        if (userParam == null) {
            throw new WebParamException.BodyParamException("请求参数不能为空");
        }
        ParamValidationUtils.webParamValidate(userParam);
        UserResult userResult = new UserResult();
        userResult.setMsg("成功");
        return Response.ok(userResult).build();
    } catch (Exception e) {
        return WebExceptionHandler.handle(e);
    }
}
- 2.可以用标准的`com.engine.common.util.ParamUtil.requestJson2Map()`方法进行转换,此方法需要较新 Ecology 版本才会有。
@Path("/getJson")
@POST
@Consumes(MediaType.APPLICATION_JSON)
@Produces(MediaType.APPLICATION_JSON)
public Response getJson(@Context HttpServletRequest request,@Context HttpServletResponse response) {
    // 获取 json
    Map<String, Object> params = ParamUtil.requestJson2Map(request);
    JSONObject json = new JSONObject(params);
    return Response.ok().build();
}
- 3.或者手动获取 request 中的 json
@Path("")
@POST
@Consumes(MediaType.APPLICATION_JSON)
@Produces(MediaType.APPLICATION_JSON)
public Response testPost(@Context HttpServletRequest request) {
    try {
        // 直接从request输入流读取JSON数据
        String jsonString = IOUtils.toString(request.getInputStream(), "UTF-8");
        JSONObject json = JSONObject.parseObject(jsonString);

        log.info("json:" + json);
        JSONObject result = new JSONObject();
        result.put("result", "success");
        return Response.ok(result.toJSONString()).build();
    } catch (IOException e) {
        // 处理异常
        return Response.status(Response.Status.INTERNAL_SERVER_ERROR).build();
    }
}
除了`ParamUtil`里的方法外,`ValidateManager`类的`requestJson2Map`方法也可以从 request 对象获取 json
`weaver.hrm.webservice.validate.ValidateManager`
参数校验
引入依赖
使用 Bean Validation 对接口参数进行校验,建议先对接口参数进行校验,是否合规,防止错误的数据流入后面的业务处理,导致问题难以排查。
需要在项目中引入3个依赖:
gradle:
// 参数校验
implementation("jakarta.validation:jakarta.validation-api:3.1.1")
implementation('org.hibernate.validator:hibernate-validator:8.0.1.Final')
implementation('org.glassfish:jakarta.el:4.0.2')
如果你是用普通的 java 项目结构(非gradle),则可以在仓库网站上根据坐标搜索到依赖,然后下载jar包,比如`jakarta.validation:jakarta.validation-api:3.1.1`依赖的坐标就是`jakarta.validation-api`,仓库地址:Maven Repository: jakarta.validation-api,点击对应的版本号之后,点此下载jar包:
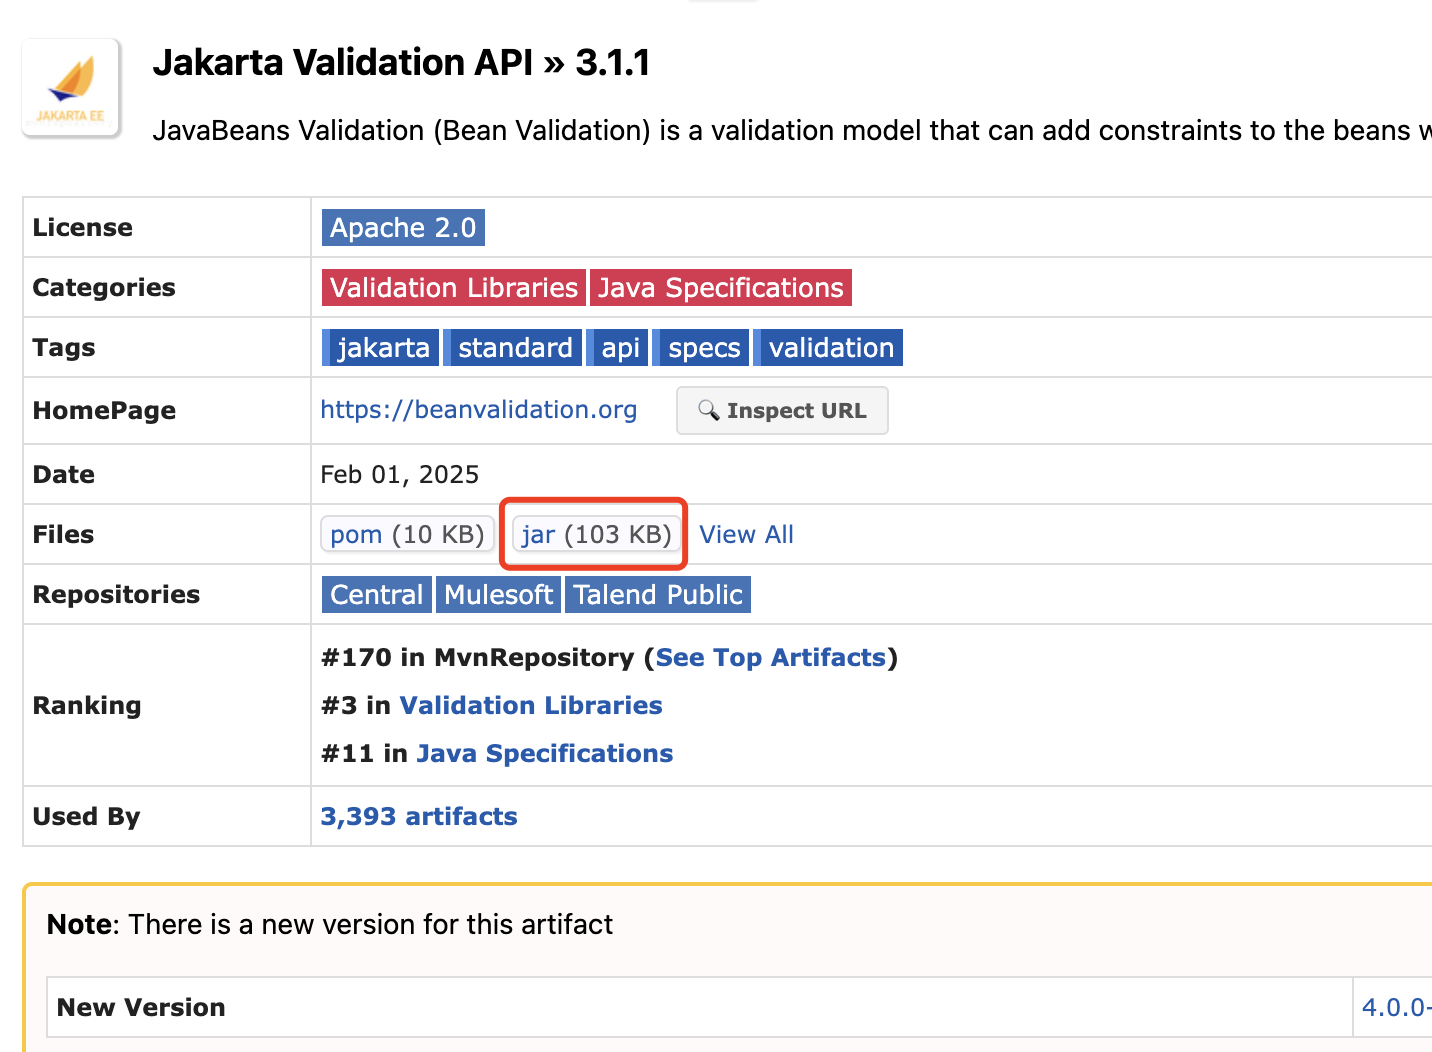
获取到依赖后将对应的这3个jar包放入服务器中的 ecology/WEB-INF/lib 目录中

使用方法
当前系统的 Jersey 版本太低(1.x),无法自动校验接口参数,需要手动校验,即手动调用 Validation 的 API 进行校验,比如:
@Path("/user")
@POST
@Consumes(MediaType.APPLICATION_FORM_URLENCODED)
@Produces(MediaType.APPLICATION_JSON)
public Response user(UserParam userParam) {
    try {
        if (userParam == null) {
            throw new WebParamException.BodyParamException("请求参数不能为空");
        }
        // 手动校验参数
        ParamValidationUtils.webParamValidate(userParam);
        UserResult userResult = new UserResult();
        userResult.setMsg("成功");
        return Response.ok(userResult).build();
    } catch (Exception e) {
        return WebExceptionHandler.handle(e);
    }
}
需要创建一个校验的工具类:(注意,代码中的某些异常是在我项目中才有的,你可以创建自己的异常代替)
/**
 * Api 参数校验工具类
 *
 * @author 姚礼林
 */
@UtilityClass
public class ParamValidationUtils {
    /**
     * 验证 API 参数,如果校验不通过则抛出异常
     *
     * @param object API BODY 参数对象
     * @throws WebParamException.BodyParamException 校验不通过时的异常
     */
    public static <T> void webParamValidate(T object) throws WebParamException.BodyParamException {
        List<String> result = validate(object);
        if (!result.isEmpty()) {
            throw new WebParamException.BodyParamException(String.join("; ", result));
        }
    }

    /**
     * 验证对象并返回所有错误信息
     */
    public static <T> List<String> validate(T object) {
        Set<ConstraintViolation<T>> violations = ValidatorInstance.INSTANCE.validator.validate(object);
        return violations.stream()
                .map(v -> v.getPropertyPath() + ": " + v.getMessage())
                .collect(Collectors.toList());
    }

    /**
     * 验证对象,如果失败抛出异常
     */
    public static <T> void validateAndThrow(T object) {
        Set<ConstraintViolation<T>> violations = ValidatorInstance.INSTANCE.validator.validate(object);
        if (!violations.isEmpty()) {
            String message = violations.stream()
                    .map(ConstraintViolation::getMessage)
                    .collect(Collectors.joining(", "));
            throw new IllegalArgumentException("验证失败: " + message);
        }
    }

    /**
     * 验证对象的特定属性
     */
    public static <T> List<String> validateProperty(T object, String propertyName) {
        Set<ConstraintViolation<T>> violations =
                ValidatorInstance.INSTANCE.validator.validateProperty(object, propertyName);
        return violations.stream()
                .map(ConstraintViolation::getMessage)
                .collect(Collectors.toList());
    }

    private enum ValidatorInstance {
        /**
         * 枚举实例
         */
        INSTANCE();
        private final Validator validator;

        ValidatorInstance() {
            validator = Validation.buildDefaultValidatorFactory().getValidator();
        }
    }
}
对请求参数和 JSON 参数都可以进行校验,只需要加上校验注解,下面是 JSON 参数的校验示例:
`UserParam`是接收的参数对象,在成员字段中加上校验注解即可:
@Data
public class UserParam {
    @NotBlank
    @NotNull
    private String name;
    @NotNull
    private Integer id;
}
还有更多校验注解,可以向 AI 提问获取这些注解的用法。
接口返回
虽然接口方法可以将 String 作为返回值,但我不建议这么做,因为它无法定义 HTTP 状态,前端只能接收到 HTTP 状态为 200,除非接口出现异常,另外不方便将类对象转为接口返回数据,比如我想将 PersonVo 对象作为接口的返回数据,我必需手动将对象转为 JSON。
// 方法返回字符串,字符串为 json 数据(不推荐)
@Path("/create")
@Consumes(MediaType.APPLICATION_FORM_URLENCODED)
@Produces(MediaType.APPLICATION_JSON)
@POST
public String create(@Context HttpServletRequest request){

}
我建议是返回`Response`对象,它可定义更丰富的返回信息
// 方法返回 Response (推荐)
@Path("/push-history")
@POST
@Consumes(MediaType.APPLICATION_FORM_URLENCODED)
@Produces(MediaType.APPLICATION_JSON)
public Response pushHistory(@FormParam("workflowIds") String workflowIds) {
    try {
        if (StringUtils.isBlank(workflowIds)) {
            throw new WebParamException.BodyParamException("[workflowIds] 参数必传");
        }
        List<Integer> ids = Arrays.stream(workflowIds.split(","))
                .map(Integer::parseInt).collect(Collectors.toList());
        HistoryArchivePushResult result = getService().pushHistoryWorkflow(ids);
        return Response.ok().entity(result).build();
    } catch (Exception e) {
        return WebExceptionHandler.handle(e);
    }
}
`Response`可直接将对象转为 JSON
return Response.ok().entity(obj).build();
可定义 HTTP 状态,比如返回500
Response.serverError()
        .entity(ApiResult.failed("服务器内部错误"))
        .build();
指定状态码
Response.status(404).build();
❌ 不支持直接返回对象,如:期望的是将 UserResult 对象转为 json 返回,但是实际上接口不会返回任何数据
@Path("/user")
@POST
@Consumes(MediaType.APPLICATION_JSON)
@Produces(MediaType.APPLICATION_JSON)
public UserResult user(UserParam userParam) {
    if (userParam == null) {
        throw new WebParamException.BodyParamException("请求参数不能为空");
    }
    ParamValidationUtils.webParamValidate(userParam);
    UserResult userResult = new UserResult();
    userResult.setMsg("成功");
    return userResult;
}
返回枚举
如果接口的返回的对象中包含枚举,如何将枚举转换为返回参数值
需要在枚举中使用 jackson 包下的`@JsonValue`注解,添加到获取参数值的方法上,例如:
public enum ParamType {
    /**
     * 字符串
     */
    STRING(0, "字符串"),

    private final int value;
    private final String displayName;

    ParamType(int value, String displayName) {
        this.value = value;
        this.displayName = displayName;
    }

    @JsonValue
    public int getValue() {
        return value;
    }
}
在接口返回时,需要使用 jackson 将对象转换为 json,如果不手动转换直接返回对象,它是不会使用 jackson 去转换的
例如:
@Path("/{id}")
@GET
@Produces(MediaType.APPLICATION_JSON)
public Response getInterfaceConf(@PathParam("id") Integer id) {
    try {
        InterfaceConfDto interfaceConf = getService().getInterfaceConf(id);
        // 使用 jackson 将对象转换为 json
        return Response.ok().entity(ParamUtil.parseObjectToJson(interfaceConf)).build();
    } catch (Exception e) {
        return WebExceptionHandler.handle(e);
    }
}
`parseObjectToJson()`方法:
/**
 * 使用 jackJson 将指定对象转换为 json
 *
 * @param object 需要转换的对象
 * @return json 对象,如果转换失败则返回 null
 */
public static JSONObject parseObjectToJson(Object object) {
    try {
        String json = MAPPER.writeValueAsString(object);
        return JSON.parseObject(json);
    } catch (JsonProcessingException e) {
        LOG.error("将指定对象转换为 json 发生异常", e);
        return null;
    }
}
通用返回体
建议在开发接口时统一使用一个返回体类,避免产生各个接口的返回体不同导致处理方式不一样
例如:
public class OpenApiResult<T> {
    private Integer status;
    private String message;
    private boolean success;
    private T data;

    public OpenApiResult(Integer status, String message, boolean success, T data) {
        this.status = status;
        this.message = message;
        this.success = success;
        this.data = data;
    }

    /**
     * 接口请求成功返回对象
     * @param data 接口数据
     * @return 接口返回体
     * @param <T> 任意类型
     */
    public static <T> OpenApiResult<T> success(T data) {
        return new OpenApiResult<>(Response.Status.OK.getStatusCode(), "success", true, data);
    }

    /**
     * 接口请求失败返回对象
     * @param message 错误信息
     * @param status 对应HTTP的状态码
     * @return 接口返回体
     * @param <T> 任意类型
     */
    public static <T> OpenApiResult<T> failed(String message, Integer status) {
        return new OpenApiResult<>(status, message, false, null);
    }

    public Integer getStatus() {
        return status;
    }

    public void setStatus(Integer status) {
        this.status = status;
    }

    public String getMessage() {
        return message;
    }

    public void setMessage(String message) {
        this.message = message;
    }

    public boolean isSuccess() {
        return success;
    }

    public void setSuccess(boolean success) {
        this.success = success;
    }

    public T getData() {
        return data;
    }

    public void setData(T data) {
        this.data = data;
    }
}
统一异常处理
建议在接口方法内使用 try catch 包裹代码块,捕获异常,并进行异常处理。如果不捕获异常,发生异常时会向上抛出,异常不会打印在集成日志,问题不好追踪,接口返回的也不是我们想要的格式。
@Path("/push-history-status")
@GET
@Produces(MediaType.APPLICATION_JSON)
public Response pushHistoryStatus() {
    try {
        ArchiveHistoryPushStatus status = getService().getHistoryPushStatus();
        return Response.ok().entity(status).build();
    } catch (Exception e) {
        // 异常处理,打印错误日志,向前端展示异常信息什么的
        return WebExceptionHandler.handle(e);
    }
}
可以定义一个通用的异常处理类,来处理接口的异常
/**
 * @author 姚礼林
 * @desc 接口异常处理,将异常
 * @date 2024/6/11
 */
@UtilityClass
public class WebExceptionHandler {

    private static final Logger logger = LoggerFactory.getLogger(WebExceptionHandler.class);

    public static Response handle(Throwable e){
        logger.error("接口发生异常",e);
        if (e instanceof WebParamException) {
            WebParamException webParamException = (WebParamException) e;
            return Response.status(webParamException.getStatus())
                    .entity(ApiResult.failed(e.getMessage()))
                    .build();
        }
        if (e instanceof FrontErrorMessage) {
            return Response.serverError()
                    .entity(ApiResult.failed("发生错误:" + e.getMessage()))
                    .build();
        }
        return Response.serverError()
                .entity(ApiResult.failed("服务器内部错误"))
                .build();
    }

    public static Response handleOpenApiException(Throwable e){
        logger.error("接口发生异常:" + e.getMessage(), e);
        if (e instanceof WebParamException) {
            WebParamException webParamException = (WebParamException) e;
            return Response.ok()
                    .entity(OpenApiResult.failed(e.getMessage(), webParamException.getStatus().getStatusCode()))
                    .build();
        }
        return Response.ok()
                .entity(OpenApiResult.failed("接口发生异常",
                        Response.Status.INTERNAL_SERVER_ERROR.getStatusCode()))
                .build();
    }
}
创建文件下载接口
使用此工具类可让接口进行文件下载
import cn.hutool.core.io.IoUtil;
import lombok.experimental.UtilityClass;
import lombok.extern.slf4j.Slf4j;

import javax.servlet.http.HttpServletResponse;
import java.io.File;
import java.io.IOException;
import java.nio.file.Files;

/**
 * @author 姚礼林
 * @desc 接口生成文件下载响应工具类
 * @date 2025/8/29
 **/
@UtilityClass
@Slf4j
public class WebFileDownloadUtil {

    /**
     * 接口生成文件下载响应,让接口可下载文件
     * @param response 响应
     * @param file 需要下载的文件
     * @param fileName 下载文件的文件名
     * @throws IOException IO异常
     */
    public static void setDownloadResponse(HttpServletResponse response, File file, String fileName) throws IOException {
        setResponseHeader(response, fileName);
        IoUtil.copy(Files.newInputStream(file.toPath()), response.getOutputStream());
    }


    private static void setResponseHeader(HttpServletResponse response, String fileName) {
        String suffix = FileUtil.getSuffix(fileName);
        response.setHeader("Character-Encoding", "utf-8");
        response.setHeader("Content-Type", "application/" + suffix);

        // 正确处理中文文件名编码
        try {
            // 使用UTF-8编码文件名,并添加引号
            String encodedFileName = java.net.URLEncoder.encode(fileName, "UTF-8");
            response.setHeader("Content-disposition", "attachment; filename=\""
                    + fileName + "\"; filename*=UTF-8''" + encodedFileName);
        } catch (Exception e) {
            // 如果编码失败,使用原始文件名
            log.warn("文件名编码失败,使用原始文件名: {}", fileName);
            response.setHeader("Content-disposition", "attachment; filename=\"" + fileName + "\"");
        }
    }
}
使用示例:
@Path("/download")
@GET
@Consumes(MediaType.APPLICATION_JSON)
@Produces(MediaType.APPLICATION_JSON)
public Response download(@Context HttpServletRequest request,@Context HttpServletResponse response) {
    try {
        WebFileDownloadUtil.setDownloadResponse(response, new File("/test.txt"), "test.txt");
        return Response.ok().build();
    } catch (IOException e) {
        return WebExceptionHandler.handle(e);
    }
}
更多文件下载示例:
[二次开发] 后端-下载文件
配置接口白名单
将接口配置在白名单后,调用接口时不需要进行认证,可直接访问。
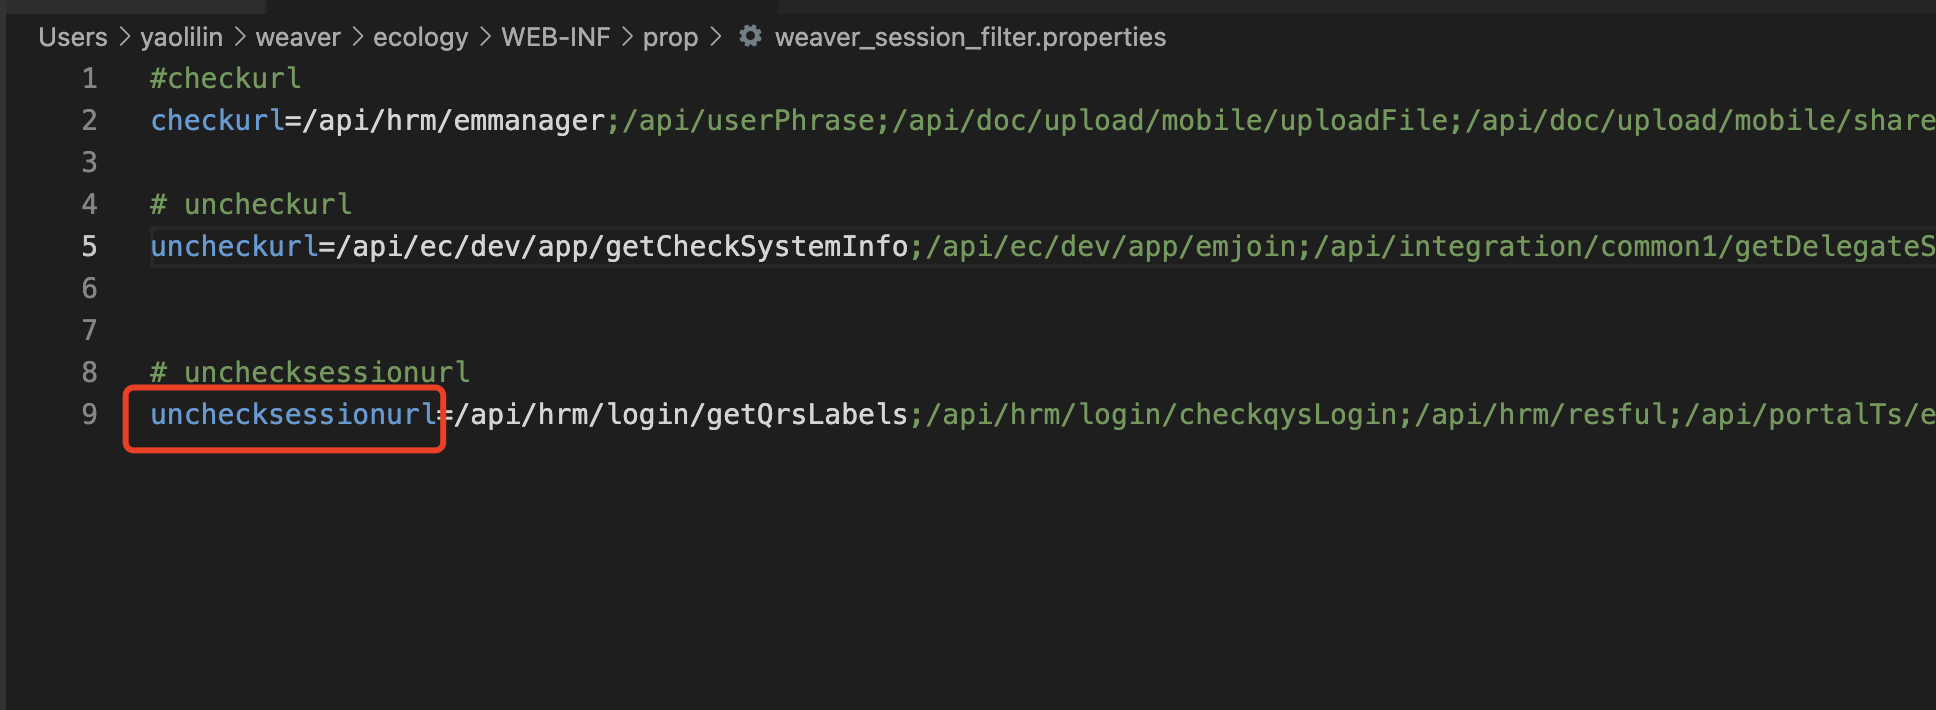
编辑`ecology/WEB-INF/prop/weaver_session_filter.properties`
修改 unchecksessionurl 属性值,在最前面或者最后面添加接口地址,注意接口地址之间要使用分号隔开
重启后生效
相关问题
系统启动不了,报错:java.lang.RuntimeException: javax.naming.NameNotFoundException: com/sun/jersey/config/CDIExtension
检查接口设置参数是否有误
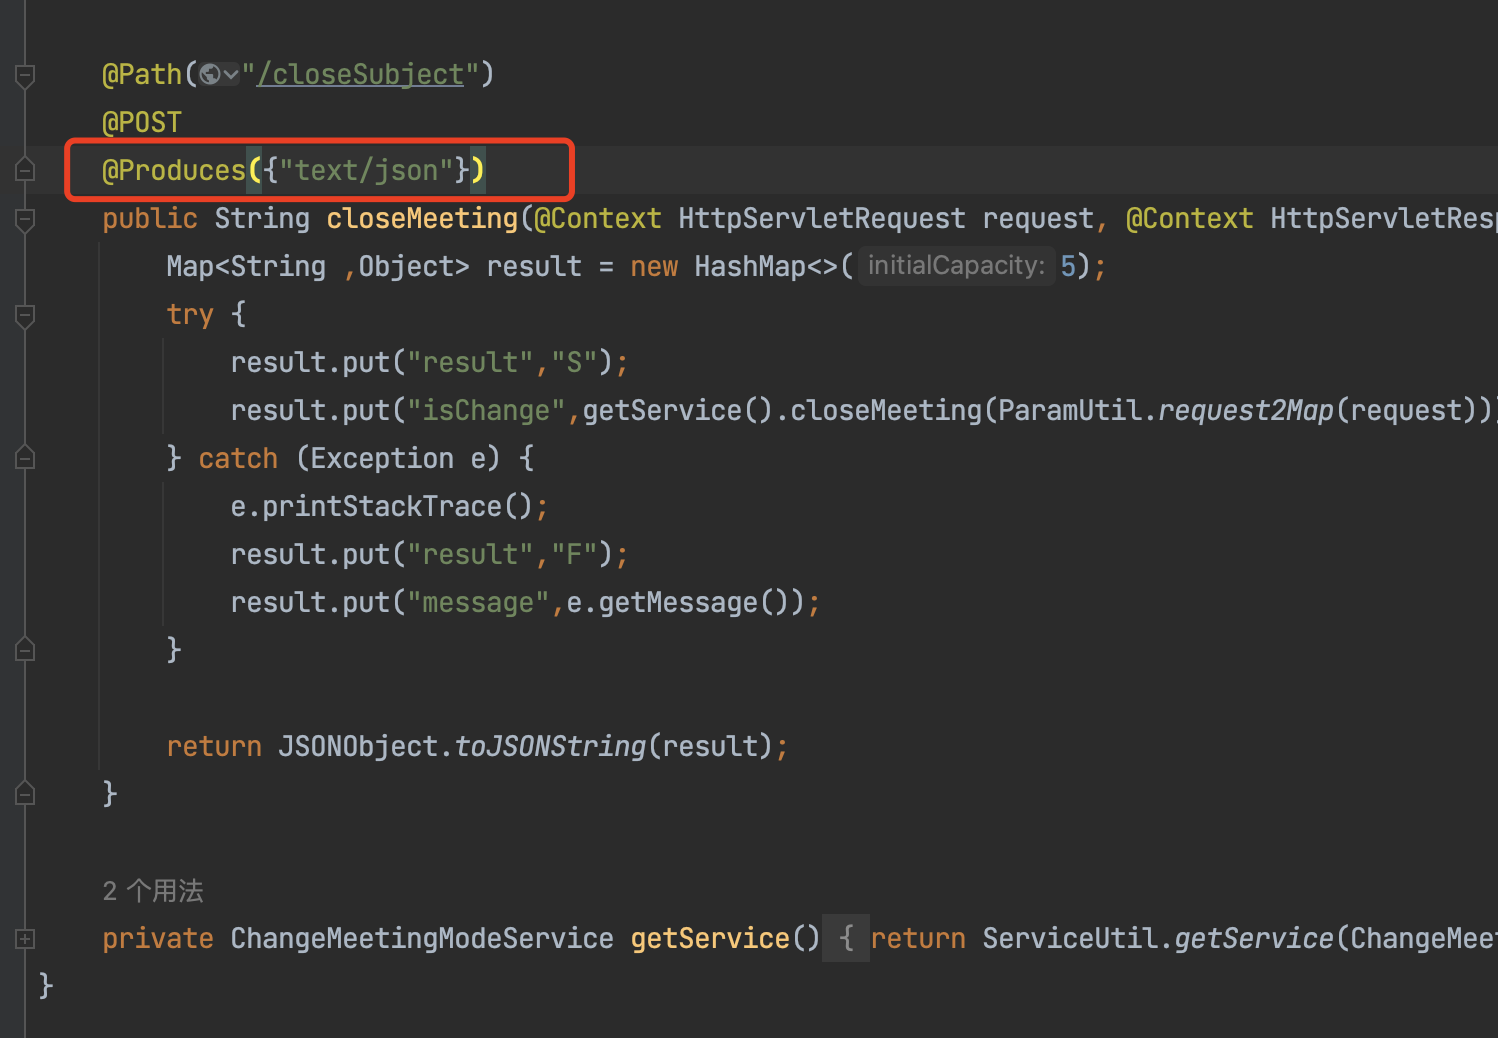
GET接口执行正常,但返回状态为500
需要设置返回的类型
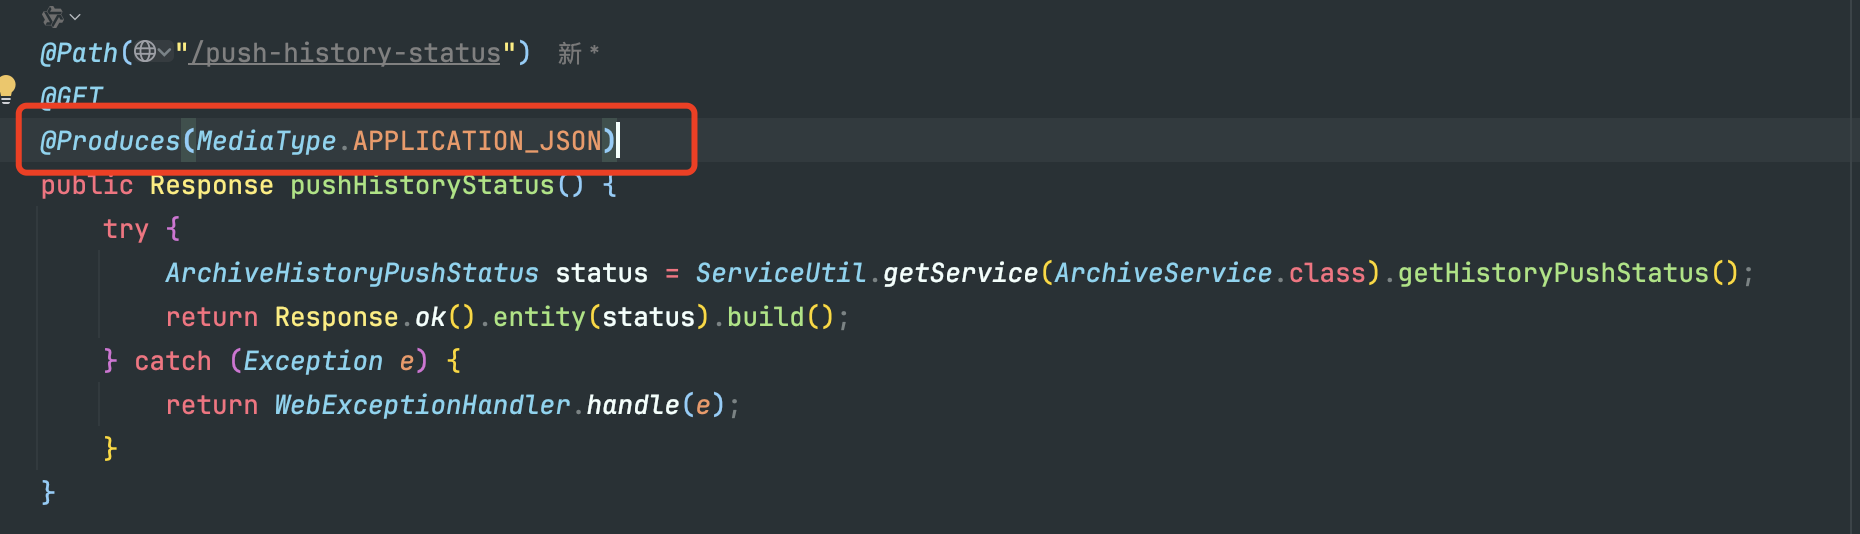
接口没问题,但就是调不通,返回404
路径相同
类上的Path路径不要和其他类相同
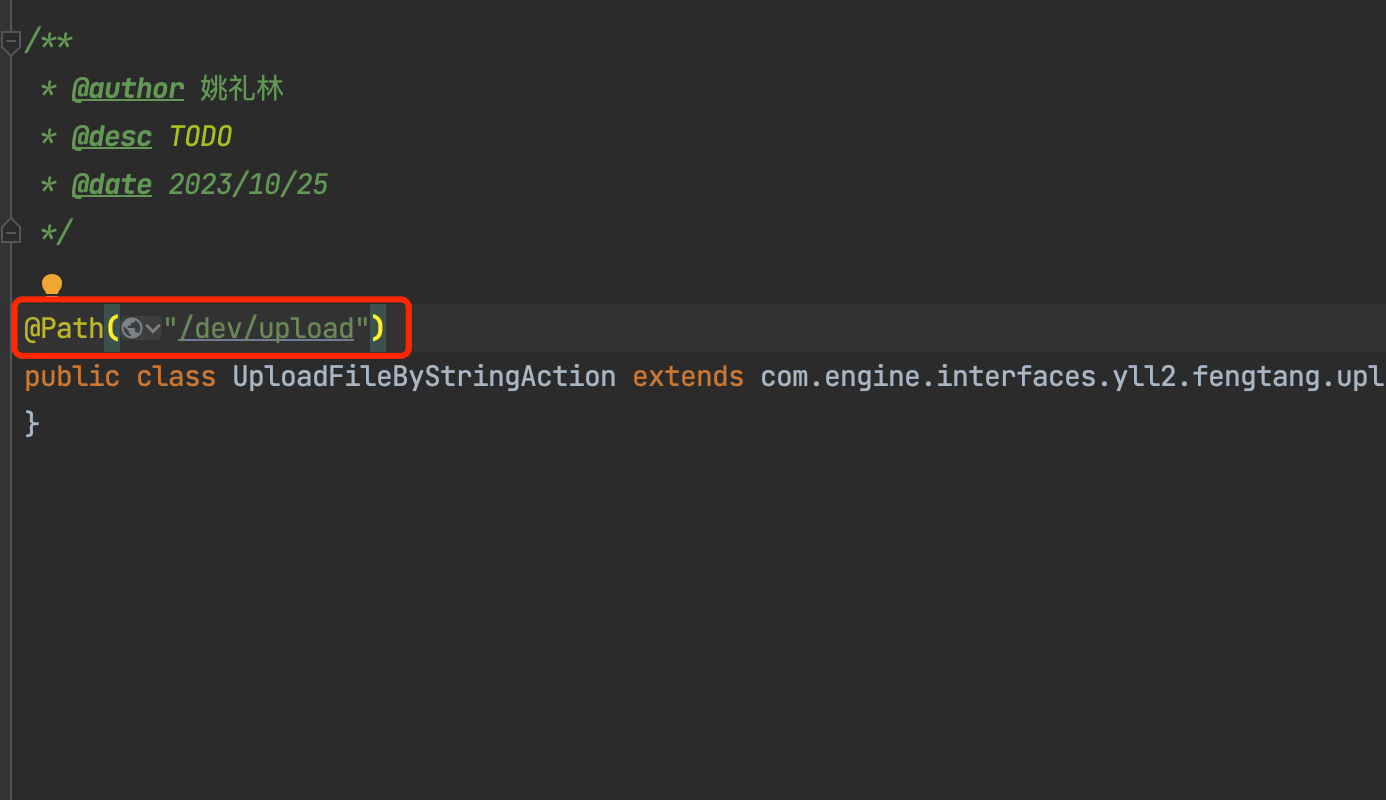
被安全包拦截
查看安全包日志,/ecology/WEB-INF/securitylog/systemSecurity日期.log ,看接口有没有被拦截,可在日志中搜索接口地址。
解决方法可按下面的 “base64传到后端发生变化” 解决方法
系统问题
这个就比较邪门,接口写的没问题,可能是系统不识别接口,可以改类名试试。
base64传到后端发生变化
当接口中的参数有 base64 时,传到后端中发生了变化
问题原因:
安全包对参数做了转换,导致跟原始传参不一致
图文描述:
解决方法:
给加了安全包的url例外解决 skip-any-check-list
后续类似问题,可以先判断是否安全拦截
在WEB-INF/securityXML文件夹中添加xml文件
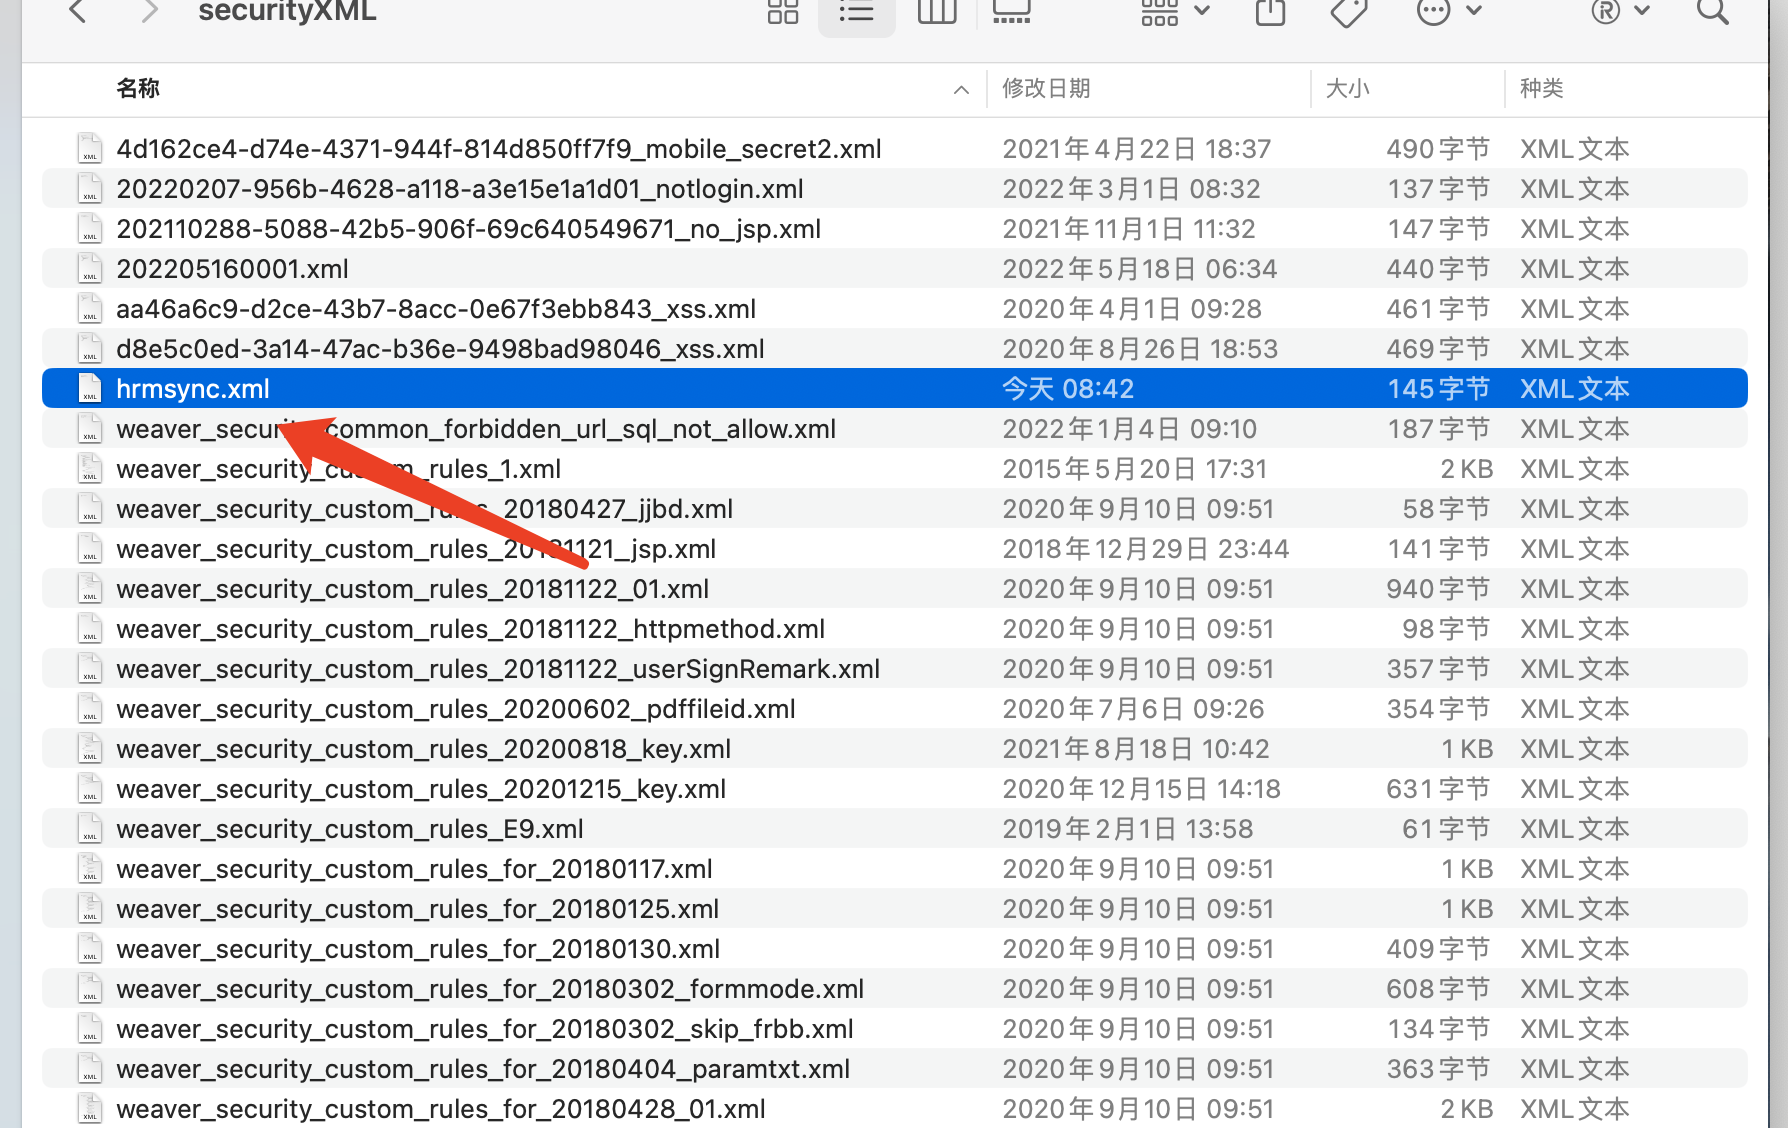
文件内容为:
<?xml version="1.0" encoding="UTF-8"?>

<root>
 <skip-any-check-list>
  <url>/api/hrm/resful/synHrmresource</url>
</skip-any-check-list>
</root>
在文件中添加要排除的链接
访问 http://您的OA地址/updateRules.jsp 生效新的拦截规则